The butt joint
is the most common of all methods of woodworking joinery. It is the method of joining lumber used for 99% of rough-in construction and finished carpentry.
With a butt joint, the flat surface of one board butts up against the flat surface of another board. The boards do not have to be square with each other. However, the surfaces that butt up against each other must be true to each other.
Figure 1 shows three typical butt joints.
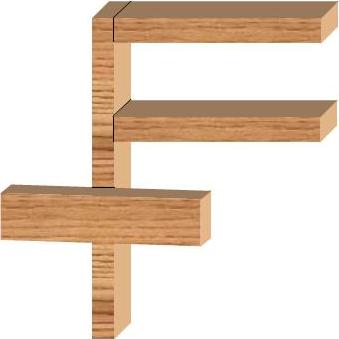
Figure 1 - Three typical butt joints
Butt joints can also be used to join two pieces of lumber that are angled to one another. Again the two surfaces that butt against each other must be true. Angled butt joints (45° angle), are common in picture frames, as shown in Figure 2.

Figure 2 - Angled butt joint on picture frame
Note: Many joinery books will discuss a mitered butt joint
, to describe a joint where the wood is joined together at an angle. I believe this terminology to be incorrect. All butt joints are or should be mitered. A 90° angle is a mitered joint. All butt joints are mitered to ensure that the surfaces of the wood that you are joining to one another are flat and true to one another.
The butt joint has no holding power of its own and must be reinforced with the aid of mechanical fasteners such as nails or screws and/or adhesives and glue. Corrugated fasteners, as shown in Figure 3, are commonly used on butt joints for frames.
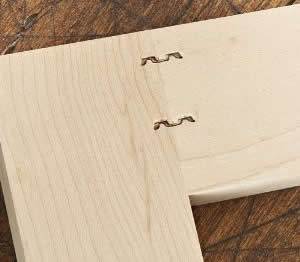
Figure 3 - Corrugated butt joint fastener
Note: Although adhesives and glues can actually provide a stronger joint than screws and nails, many adhesives do not work well on the end grains of wood. End grains are porous and absorb the glue rather than allowing the glue to bond.
Brackets can also be used as a connection method. Floor joists, which are always installed as a butt joint, often use a bracket called a joist hanger, as shown in Figure 4, to attach the floor joist lumber to other structural members.
Roof trusses also use butt joints. These joints are usually held together with roof truss gusset plate, as shown in Figure 5.
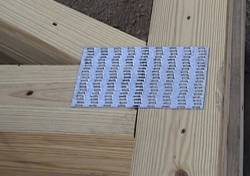
Figure 5 - Roof truss gusset plate
The key to creating a proper butt joint is to ensure that at the point where the two pieces of lumber touch one another the surfaces are flat and true.
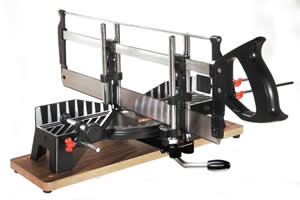
In rough-in carpentry lumber is usually cut to length using a circular saw, however, a perfect butt joint can only be made with the use of a miter box or miter saw
. Miter saws are available as hand operated frames that hold a back saw true to the lumber, as shown in Figure 6, or a powered miter saw, as shown in Figure 7. A radial arm or table saw can also be used to create clean and true surfaces on the wood in order to create butt joints.